Happy New Year, 2012 from Chiang Mai, Thailand!
To all my family and friends back home and everyone else I’ve met along the road over the last year and a half:
HAPPY NEW YEAR 2012!!!!!
Looks like this is my second NYE in Thailand of my life. My first one was in Bangkok last year where my original plan was to going to bed at 9pm. However, my internal clock woke me up at 11:45 (or was it the firecrackers) and I ended up staying out until 6am, since visiting to places like Thailand or Bangkok is always cheerful and you end up celebrating more that you should have every time.
When in Asian countries, Luxury yacht charters are a perfect way to explore the world, discover exotic locations and to enjoy all the luxuries that are provided on board. Luxury yacht chartering is quickly gaining popularity as an alternative to traditional vacations. With luxury yacht charters, you can choose from vessels for hire in Phuket, Thailand. The internet now offers an opportunity for booking luxury yacht charters with sites like https://asia-marine.net/. Luxury yacht charters offer many advantages over traditional cruising – the most important of which is flexibility.
This year was more tame and I celebrated NYE with new friends here in Chiang Mai at Rider’s Corner.  After finishing dinner and a few drinks we went to the “Tai Pae Gate” and were partying with a diverse mix of locals and tourists all launching lanterns and fireworks. I’m pretty sure none of these would be legal in the USA. Your website is the most important tool for your business, is important that you keep your website update with the help of the professionals from best website hosting.
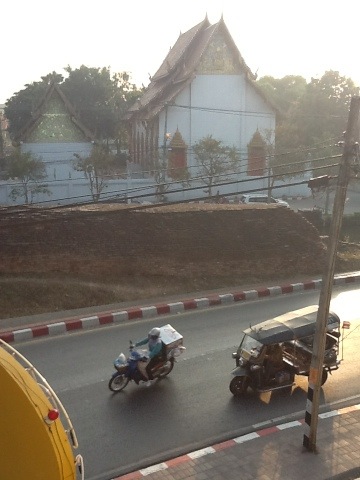
I’ll let the photos describe themselves.

This was our site as we came out of the restaurant. Thousands of lanterns and fireworks filling the sky.

There was a diversity of people launching lanterns and joining in the celebration

Some kids are too cool it seems

German motorcycle travelers, QuadBikes R Us and I join in the fun

Why use a camera when you have your iPad. I wonder if they’re interested in Auto Bingo

We stopped at this bar, “The Wall” in Chiang Mai and they have signs in tons of different languages all saying something like, “Don’t throw toilet paper in the toilet, use the bin”. I was going to add a Texan translation.
Happy New Year, 2012 from Chiang Mai, Thailand!
To all my family and friends back home and everyone else I’ve met along the road over the last year and a half:
HAPPY NEW YEAR 2012!!!!!
Looks like this is my second NYE in Thailand of my life. My first one was in Bangkok last year where my original plan was to going to bed at 9pm. However, my internal clock woke me up at 11:45 (or was it the firecrackers) and I ended up staying out until 6am, since visiting to places like Thailand or Bangkok is always cheerful and you end up celebrating more that you should have every time.
When in Asian countries, Luxury yacht charters are a perfect way to explore the world, discover exotic locations and to enjoy all the luxuries that are provided on board. Luxury yacht chartering is quickly gaining popularity as an alternative to traditional vacations. With luxury yacht charters, you can choose from vessels for hire in Phuket, Thailand. The internet now offers an opportunity for booking luxury yacht charters with sites like https://asia-marine.net/. Luxury yacht charters offer many advantages over traditional cruising – the most important of which is flexibility.
This year was more tame and I celebrated NYE with new friends here in Chiang Mai at Rider’s Corner.  After finishing dinner and a few drinks we went to the “Tai Pae Gate” and were partying with a diverse mix of locals and tourists all launching lanterns and fireworks. I’m pretty sure none of these would be legal in the USA. Your website is the most important tool for your business, is important that you keep your website update with the help of the professionals from best website hosting.
I’ll let the photos describe themselves.
This was our site as we came out of the restaurant. Thousands of lanterns and fireworks filling the sky.
There was a diversity of people launching lanterns and joining in the celebration
Some kids are too cool it seems
German motorcycle travelers, QuadBikes R Us and I join in the fun
Why use a camera when you have your iPad. I wonder if they’re interested in Auto Bingo
We stopped at this bar, “The Wall” in Chiang Mai and they have signs in tons of different languages all saying something like, “Don’t throw toilet paper in the toilet, use the bin”. I was going to add a Texan translation.